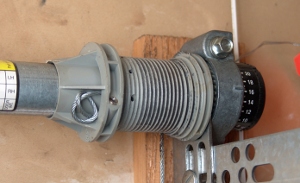
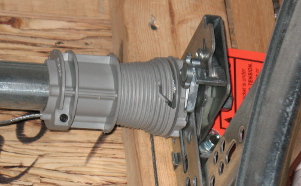
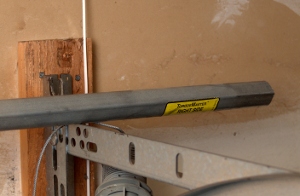
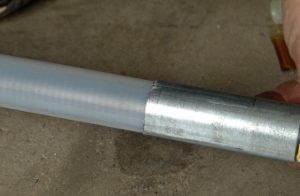
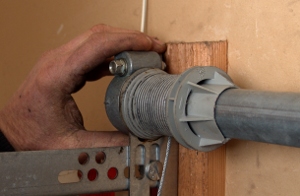
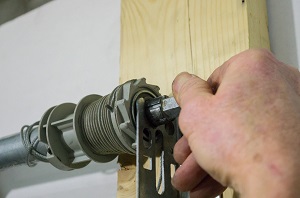
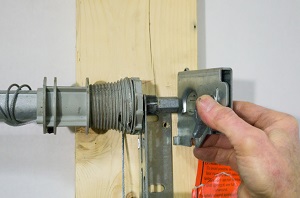
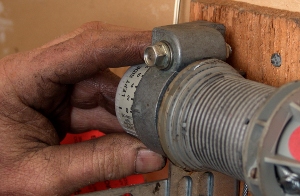
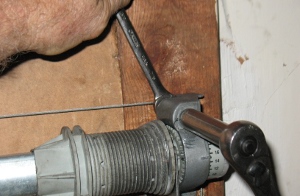
TorqueMaster springs are not visible because they are inside the torsion tube. This system was designed for safety to avoid some of the risks involved with replacing standard torsion springs. Over the years Wayne Dalton has designed two types of winders to tension the springs.
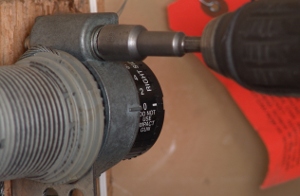
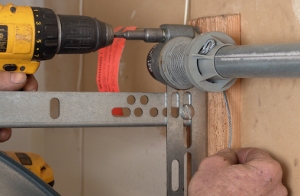
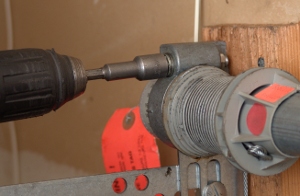
The original TorqueMaster One spring assemblies incorporate a gearbox to allow the homeowner to easily wind his springs using an electric drill with a 7/16" nut driver or socket.
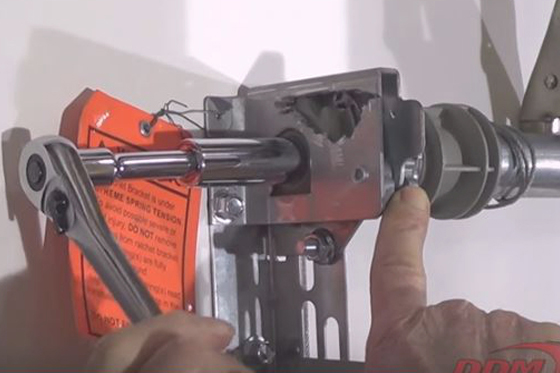
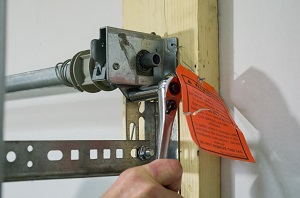
The newer TorqueMaster Plus or Torquemaster II torsion springs use a ratchet winder to tension the springs. These are wound with a 5/8" socket and socket wrench. If you have this newer style TorqueMaster Plus springs we recommend you first view our four minute video. Without using the proper tools replacing the springs can be dangerous. You'll also need the specific instructions for unwinding your broken spring if you have two springs on your door.
If you have two springs on your garage door, we suggest that you replace both; your second unbroken spring is likely to break soon. Though these instructions are written for a double spring system, you can eliminate some of the steps in this tutorial to replace a single spring. You can purchase these springs on our Wayne Dalton Torquemaster Springs page. Also, in the steps below we recommend checking the counter gears and drive gears. These gears are no longer available. If your drive gear is stripped, you can order new springs along with a conversion kit on our Wayne Dalton Garage Door Parts page.
Wayne Dalton also published instructions for replacing the original TorqueMaster springs as well as the Torquemaster Plus springs, but they're difficult to follow. If a picture's worth a thousand words, these instructions should be sufficient for do-it-yourselfers.
1. Sometimes the door is opened after a spring breaks. Exercise caution! Close the garage door before disengaging the opener. Often you will need to remove a clevis pin and a cotter pin.
2. Unplug the opener. This will keep the opener from running if somebody accidentally tries to open the door while you are working. It also allows you to confirm that you have a broken spring. Single car doors usually have only one spring; when the spring breaks both cables come loose. On double car doors the door becomes heavy when a spring breaks, and it's hard to lift. If you put a scale under the door you will get a reading of over 50 pounds if one of the springs is broken.
3. It is now time to unwind the unbroken spring. If you have the newer TorqueMaster Plus winder system, you will need to unwind the spring with a 5/8" deep well socket. Pull down on the winding shaft, push down on the pawl, and then raise the ratchet wrench almost to the header and release the pawl. Repeat the process until the spring unwinds. If the winding shaft turns freely, the spring on this side is broken. More information is on our YouTube video titled
How to Unwind TorqueMaster Plus Springs. After unwinding the spring, proceed to step 9 below.
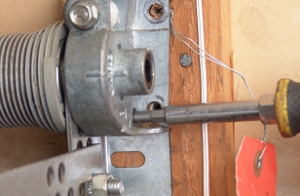
4. If you have the older original TorqueMaster springs, you need to unwind the gear that holds the tension in the torsion springs. First, loosen the lock nut. Turn the socket wrench in front counter clockwise one quarter turn.
5. Using a 7/16" nut driver or a 7/16" hex-head socket in a drill, unwind the winding bolt head on the gearbox located on the right. Unwind by turning the bolt head counterclockwise. If this spring is not broken, you will be unwinding the spring. If the spring is broken, you will just be resetting the gearbox. As you run the drill, the "0" on the counter assembly should slowly approach the tick mark on the end bracket.
6. Stop when the "0" lines up with the mark on the end bracket. If the spring is not broken, it should now be unwound.
7. If you have a second TorqueMaster spring inside your torque tube, you will need to unwind it as well. Loosen the lock nut a quarter turn as you did on the right side. Unwind the right spring by turning the bolt head counterclockwise as you did on the right side. As you unwind the spring the "0" on the counter wheel should move toward the tick mark. If you only have one spring, you will not have the gearbox on the left side.
8. When there is no longer any spring tension, the cables will loosen. DANGER: If the cable is not loose, figure out where the tension is coming from. Remove this tension before proceeding. Proceed to step 15.
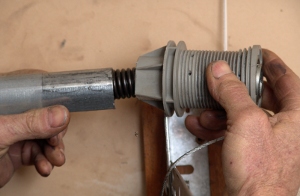
9. If you have the newer TorqueMaster Plus springs, remove the lag screw with a 7/16" socket or open end wrench. Turn the head of the screw counterclockwise.
10. The bottom of the winder is bolted to the flag angle. Locate the 5/16" nut.
11. Loosen the nut by turning it counterclockwise with a 1/2" socket.
12. Remove the nut and carriage bolt.
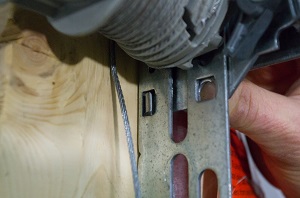
13. Notice the hook on the bottom of the winder bracket.
14. Position the bracket so the hook can slide out of the hole, pull the bracket to the right, lift the torsion tube and slide the winder off the winder cone. Go to the other side of the door, unwind the spring and remove the winder bracket following the same procedure. Proceed to step 29 below.
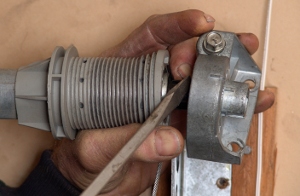
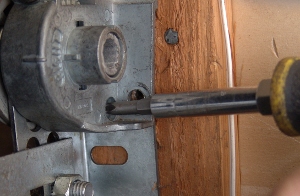
15. If you have the older TorqueMaster system, you can now disassemble the gearboxes. Carefully pry the counter gear off the end bracket with a screwdriver.
16. Remove the counter gear from the shaft.
17. Inspect the counter gear and wheel. If they are damaged you can insert rolled paper into the end of the assembly. You'll see how to do this in later steps.
18. Remove the lag screws that hold the end bracket to the garage header. Turn the heads of the screws counterclockwise.
19. You can use wrenches or sockets to remove these screws - the best tool depends on the space you have and your selection of tools.
20. Remove the Phillips-head screw that secures the end bracket. This screw is often missing because the original installer forgot to install it. As long as the other two lag screws are secure, the door should work fine if these screws are missing.
21. You may need to use a punch, awl, or nail to remove the screw once it is loose.
22. Lift the assembly off the top of the flag bracket.
23. You are now ready to disassemble the right end of the torque tube. Pry the end bracket off of the winding cone.
24. The end bracket encases the drive gear. Notice also the end of the black winding cone sticking out through the bearing of the cable drum. Check the drive gear for stripped teeth. These parts are no longer made. If your gear or gear box is damaged, you will need to order the new style TorqueMaster Plus springs and a conversion kit.
25. Remove the cable drum from the shaft. You probably will have to twist the drum on the torque tube or tap it gently with a hammer to remove the drum from the tube.
26. If the spring is broken, pull the end portion of the spring out of the tube. On heavier doors with bigger springs you'll see a 3/8" metal rod sticking out of the tube. Wayne Dalton uses this rod as a spacer to gap the springs. You will remove the rest of the spring later.
Slide the tube a few inches to the left so that it rests on the angle supporting the horizontal track.
27. Move to the left side of the garage door. If you have a double-spring assembly, you will now disassemble the left side. Remove the two lag screws that secure the end bracket to the header. Remove the screw as well.
28. Remove the counter assembly, the counter gear, the end bracket, and the drive gear.
29. Twist the cable drum to remove it from the tube. Tap the drum gently with a hammer if necessary.
30. If this spring is broken, remove the end portion from the tube. Otherwise, leave the spring in the tube.
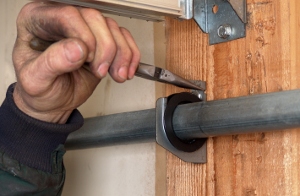
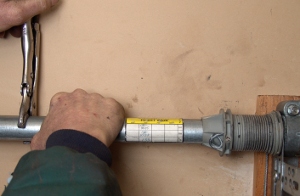
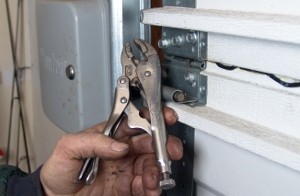
31. Move to the center bracket. Bend the top of the bracket away from the bushing with a vise grip.
32. Slide the shaft to one side of the door. This will help you to balance the tube when you remove it.
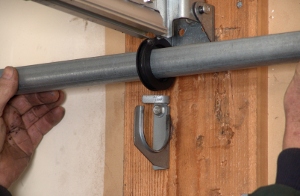
33. Raise the torque tube so that the bushing comes out of the center support bracket.
34. Lower the tube to the floor. Watch out for vehicles. Assume that the weight distribution of the tube may change at any moment - part of the broken spring may slide to the other end of the tube. Note: if you are only replacing the center support bracket, remove the black ring from the tube pictured in step 33 and slide on the new ring and bracket. Next, remove the two screws that secure the bracket to the jamb shown in step 33. Third, replace the instructions in steps 47-48 with this: Secure the bracket to the jamb with the two screws removed earlier.
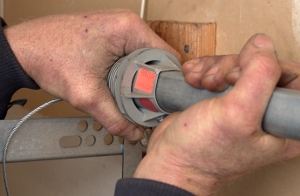
35. TorqueMaster springs have an outer liner to prevent the springs from rattling in the torsion tube as the garage door operates. You will need to remove the liner before the spring will slide out. There will likely be some friction between the plastic sleeve and the tube, particularly in cold weather. Our YouTube video on
How to Remove Wayne Dalton TorqueMaster Springs should help.
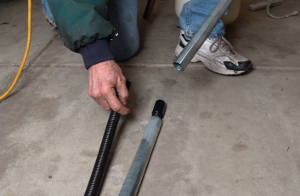
36. The remainder of the broken spring should slide out of this side of the tube as well. If the other end of the spring is stuck inside the tube, knock it loose with a hammer and a long rod. A broomstick or a length of conduit will usually work. Often it is easier to just allow the spring slide out the other end.
37. Remove the sleeve in the other end of the tube. Dried grease often bonds the end of the liner to the inside of the tube. You may need to use needle nose pliers to grip and pull the sleeve. If the liner strips when pulling on it, grip the end of the liner with the pliers and turn the pliers around two or three times. This will break the bond between the liner and the torsion tube. You can also insert a hacksaw blade or a coat hanger between the liner and tube to break the bond. You can also heat the end of the tube to loosen the liner. After removing both springs and the plastic liners look through one end of the tube to make certain all the parts are removed and the tube is completely empty.
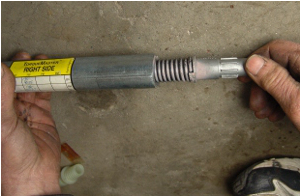
38. Compare your new TorqueMaster spring with your old spring. This door had springs with black plastic cones; the replacement spring has steel cones. Using a different material will not matter, as long as the very end of the cone is round if you have an original Torquemaster system. Check the wind of the springs. The new right-wind spring replaces the old right-wind spring on the right side of the garage door. The opposite is true for the left-wind spring. If you are unsure of your spring's wind, see our
torsion spring FAQ's.
39. The manufacturer used to include a new counter assembly, a counter gear, some grease, and an additional winding cone. However, these parts no longer come with the springs. You should be able to reuse your existing counter gears and counter wheels. If the drive gear is dry you will want to lubricate it with motor oil, 3-In-One oil, Vaseline or light grease.
40. Examine the winding end of each spring. Look for the embossed designation of "Left" or "Right" or a part number beginning with "LH" or "RH." These designate the wind of the springs. Select the right wind spring and slide it into the right side of the torque tube, perch-end first.
41. As you slide the spring into the tube, there will likely be friction between the spring sleeve and the tube. Though forcing the sleeve into the tube is okay, you may find it beneficial to straighten the end of the tube if it is bent.
42. When the sleeve is completely inside of the tube, the winding cone should still stick out. It is okay if an inch or two of spring also sticks out of the tube when the perched end of the spring is against the opposite end of the sleeve. Notice the wind of the spring. It is right wind. As you look at the door from inside the garage, this right wind spring goes in the right end of the tube.
43. The end of the sleeve should stick slightly out of the tube, as pictured.
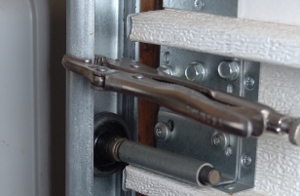
44. Vise grip the winding cone without distorting its shape. The vise grip is only there to keep the spring from sliding into the tube.
45. Install the left-wind spring in the torque tube. Vise grip the winding cone as well.
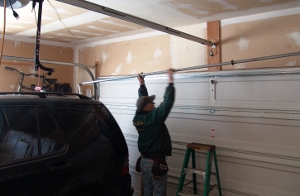
46. Raise the tube back up above the garage door. Caution: there may not be an even distribution of weight. Swing the vise grip on one end of the tube over the horizontal track to help support the tube as you position it.
47. Align the bushing in the center bracket.
48. Bend the top of the center bracket back over the bushing.
49. Move to the left side of the door. Position the winding cone in the groove at the top of the flag bracket. Remove the vise grip.
50. Remove the vise grip on the other side of the garage door, making sure that the tube will not fall. If the sleeve has started to slide out of the tube, as pictured, slide it back into the tube.
51. Slide the cable drum over the winding cone and onto the shaft. There should be a small gap between the edge of the bearing on the cable drum and the teeth on the winding cone.
52. Greasing or oiling the bearing will also extend the bearing's life. If you have the TorqueMaster Plus system, proceed to step 70 below.
53. Grease or oil the drive gear.
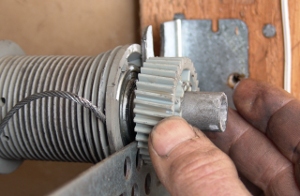
54. Slide the drive gear on the winding cone as pictured.
55. Set the winding cone in the groove on the flag bracket. The cable drum should still be tight on the tube.
56. Slide the drive gear against the flag bracket. Slide the end bracket over the drive gear.
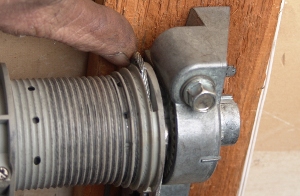
57. Pull down on the torque shaft so that the cable wraps around the back of the drum. The cable should be tight enough that it will stay in the groove, but loose enough that you can slip it out. Vise grip the tube at this position as pictured.
58. When the end bracket is positioned properly on the winding cone, the top worm gear should be in position to turn the drive gear. The end of the winding cone should be flush with the end of the end bracket.
59. Install the screw that secures the end bracket.
60. Reinstall both lag screws to secure the end bracket to the garage header. Turn the screws clockwise.
61. Move to the other side of the garage door. Install the cable drum and reassemble the gearbox.
62. Secure the end bracket to the flag bracket and to the garage header as you did on the other side.
63. Check to make sure that the cable is in the groove of the drum.
64. Make sure that the cable on the other drum is still in the groove. Pull down on the shaft, tightening the cable on the drums. Reposition the vise grip on the tube to hold the cable on the drums. Make sure that both cables are still on the drums.
65. Place the counter gear inside the counter assembly. The missing tooth of the counter gear should line up with the notch in the counter assembly by the number zero.
66. Install these components on the end of the winding cone. If the initial position does not read "0", you will need to account for this difference when you wind the spring.
67. Before winding the springs, vise grip the track 2-3" above one of the rollers. If there is too much tension on your springs, this will keep the door from opening and knocking you off of your ladder.
68. Wind the spring by turning the winding bolt head clockwise with a 7/16" hex head extension in a drill. NOTE: If the bolt and nut tighten as you wind the spring, loosen the lock nut on the back side as needed to wind the spring. Otherwise you run the risk of stripping the bolt head or breaking the cast winder housing. The proper number of turns depends on your garage door height.
6'-high: 14 turns
7'-high: 16 turns
8'-high: 18 turns
69. The counter gears and counter wheels are no longer available. If these do not work, you can simply roll up and mark a piece of paper. Insert this into the end of the winder cone and count the turns each time the mark circles. Continue to step 80 if you have the original TorqueMaster system.
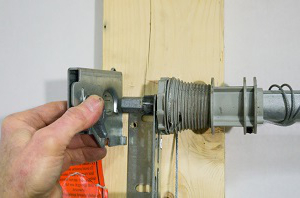
70. If you have the newer system, after installing the drum, pull on the end of the spring slightly and align the recessed neck of the winding cone with the u-shaped slot at the top of the flag angle. Seat the winding cone into the u-shaped slot.
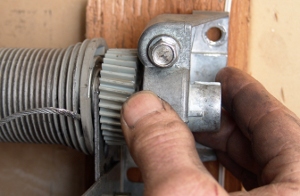
71. Slide the winder bracket onto the winding cone until it is flush against the flag angle. The hex end of the cone should engage with the center of the winder sprocket.
72. If the winder gear does not engage with the end cone, turn the teeth of the white plastic gear until you can get it to slide freely onto the winding cone.
73. Check to confirm the hook fits properly into the square slot.
74. Secure the winder with the 5/16" carriage bolt . . .
75. . . . and the 7/16" lag screw.
76. Follow the same procedure on the left side. Turn the torque tube to tighten the cables on both drums, and vise grip the tube to hold the cables on the drums as we show in step 57 above.
77. Before winding the springs, vise grip the track 2-3" above one of the rollers. If there is too much tension on your springs, this will keep the door from opening and knocking you off of your ladder.
78. If you have the TorqueMaster Plus system, it is now time to wind the springs. Lift the pawl knob to engage the ratchet pawl and wheel. Mark the socket and wind down with a socket wrench and a 5/8" socket. On a 7’ high door, wind each spring 16 turns; on an 8’ high door, wind each spring 18 turns. After winding the spring, lower the pawl knob. This will activate the anti-drop safety device so that the drum pawl locks the cable drum the next time a spring breaks.
79. Follow the same procedure to wind the spring on the left side. On this side you will wind down just as you did on the first side. After winding the spring, lower the pawl knob to engage the safety device.
80. Install the counter gear and counter assembly on the second winding cone.
81. Wind the second spring clockwise, taking note of the top roller's position in relation to the vise grip. Stop if the door begins to rise.
82. If the door begins to rise, you will need to remove tension from both springs by turning the bolt heads counterclockwise.
83. If the garage door stays on the garage floor with both springs wound, remove the vise grip from the track.
84. Test the garage door. It should remain open on its own when it is open. It should stay on the floor when it is closed.
85. How to Level a Garage Door with Wayne Dalton TorqueMaster Springs. If the garage door is not level, you will need to adjust the length of the cable on the side that is too high. Holding the end of the cable with a vise grip, loosen the setscrew on the cable drum. Adjust the cable length until the door is level. Secure the setscrew with 1 to 1-1/2 turns after it is snug against the cable to prevent it from slipping.
86. If you have the original TorqueMaster springs, re-tighten the lock nuts on both winding units. Turn the bolt heads clockwise.
87. If you did not do so already, oil both end bearings. You can use 40 weight motor oil, but 10W40 will also work fine.
88. Oil the center support bushing.
89. Reinstall the opener drawbar arm.
90. Plug in your garage door opener. Check your garage door travel and force, and adjust as needed.
